Create your first repository
A repository is where you track one biological asset in CellRepo.
If you think in lab terms, a repository usually corresponds to:
- one strain,
- one construct,
- one cell line,
- or one engineered biological variant.
Each repository has its own history, updates, and records.
Optional demonstration
Watch a short video showing how repositories are created, structured, and explored inside a project.
What a repository represents
A repository represents one specific biological entity, tracked over time.
It does not represent:
- a project,
- a collection of unrelated assets,
- or an entire experiment space.
For example:
- one engineered E. coli strain,
- one plasmid design,
- one mammalian cell line under testing.
If a project involves multiple experimental directions or variants, each one is typically tracked in its own repository.
Projects group work.
Repositories track individual assets.
(You can revisit the definitions in the
CellRepo concepts > Key terms at a glance.)
When to create a new repository
Create a new repository when:
- you start working with a new strain, construct, or cell line,
- an experimental variant becomes important to track,
- you want a clear history of changes to one biological entity.
You do not need to wait until the asset is final.
Repositories are designed to evolve as the biology evolves.
Steps: create a repository
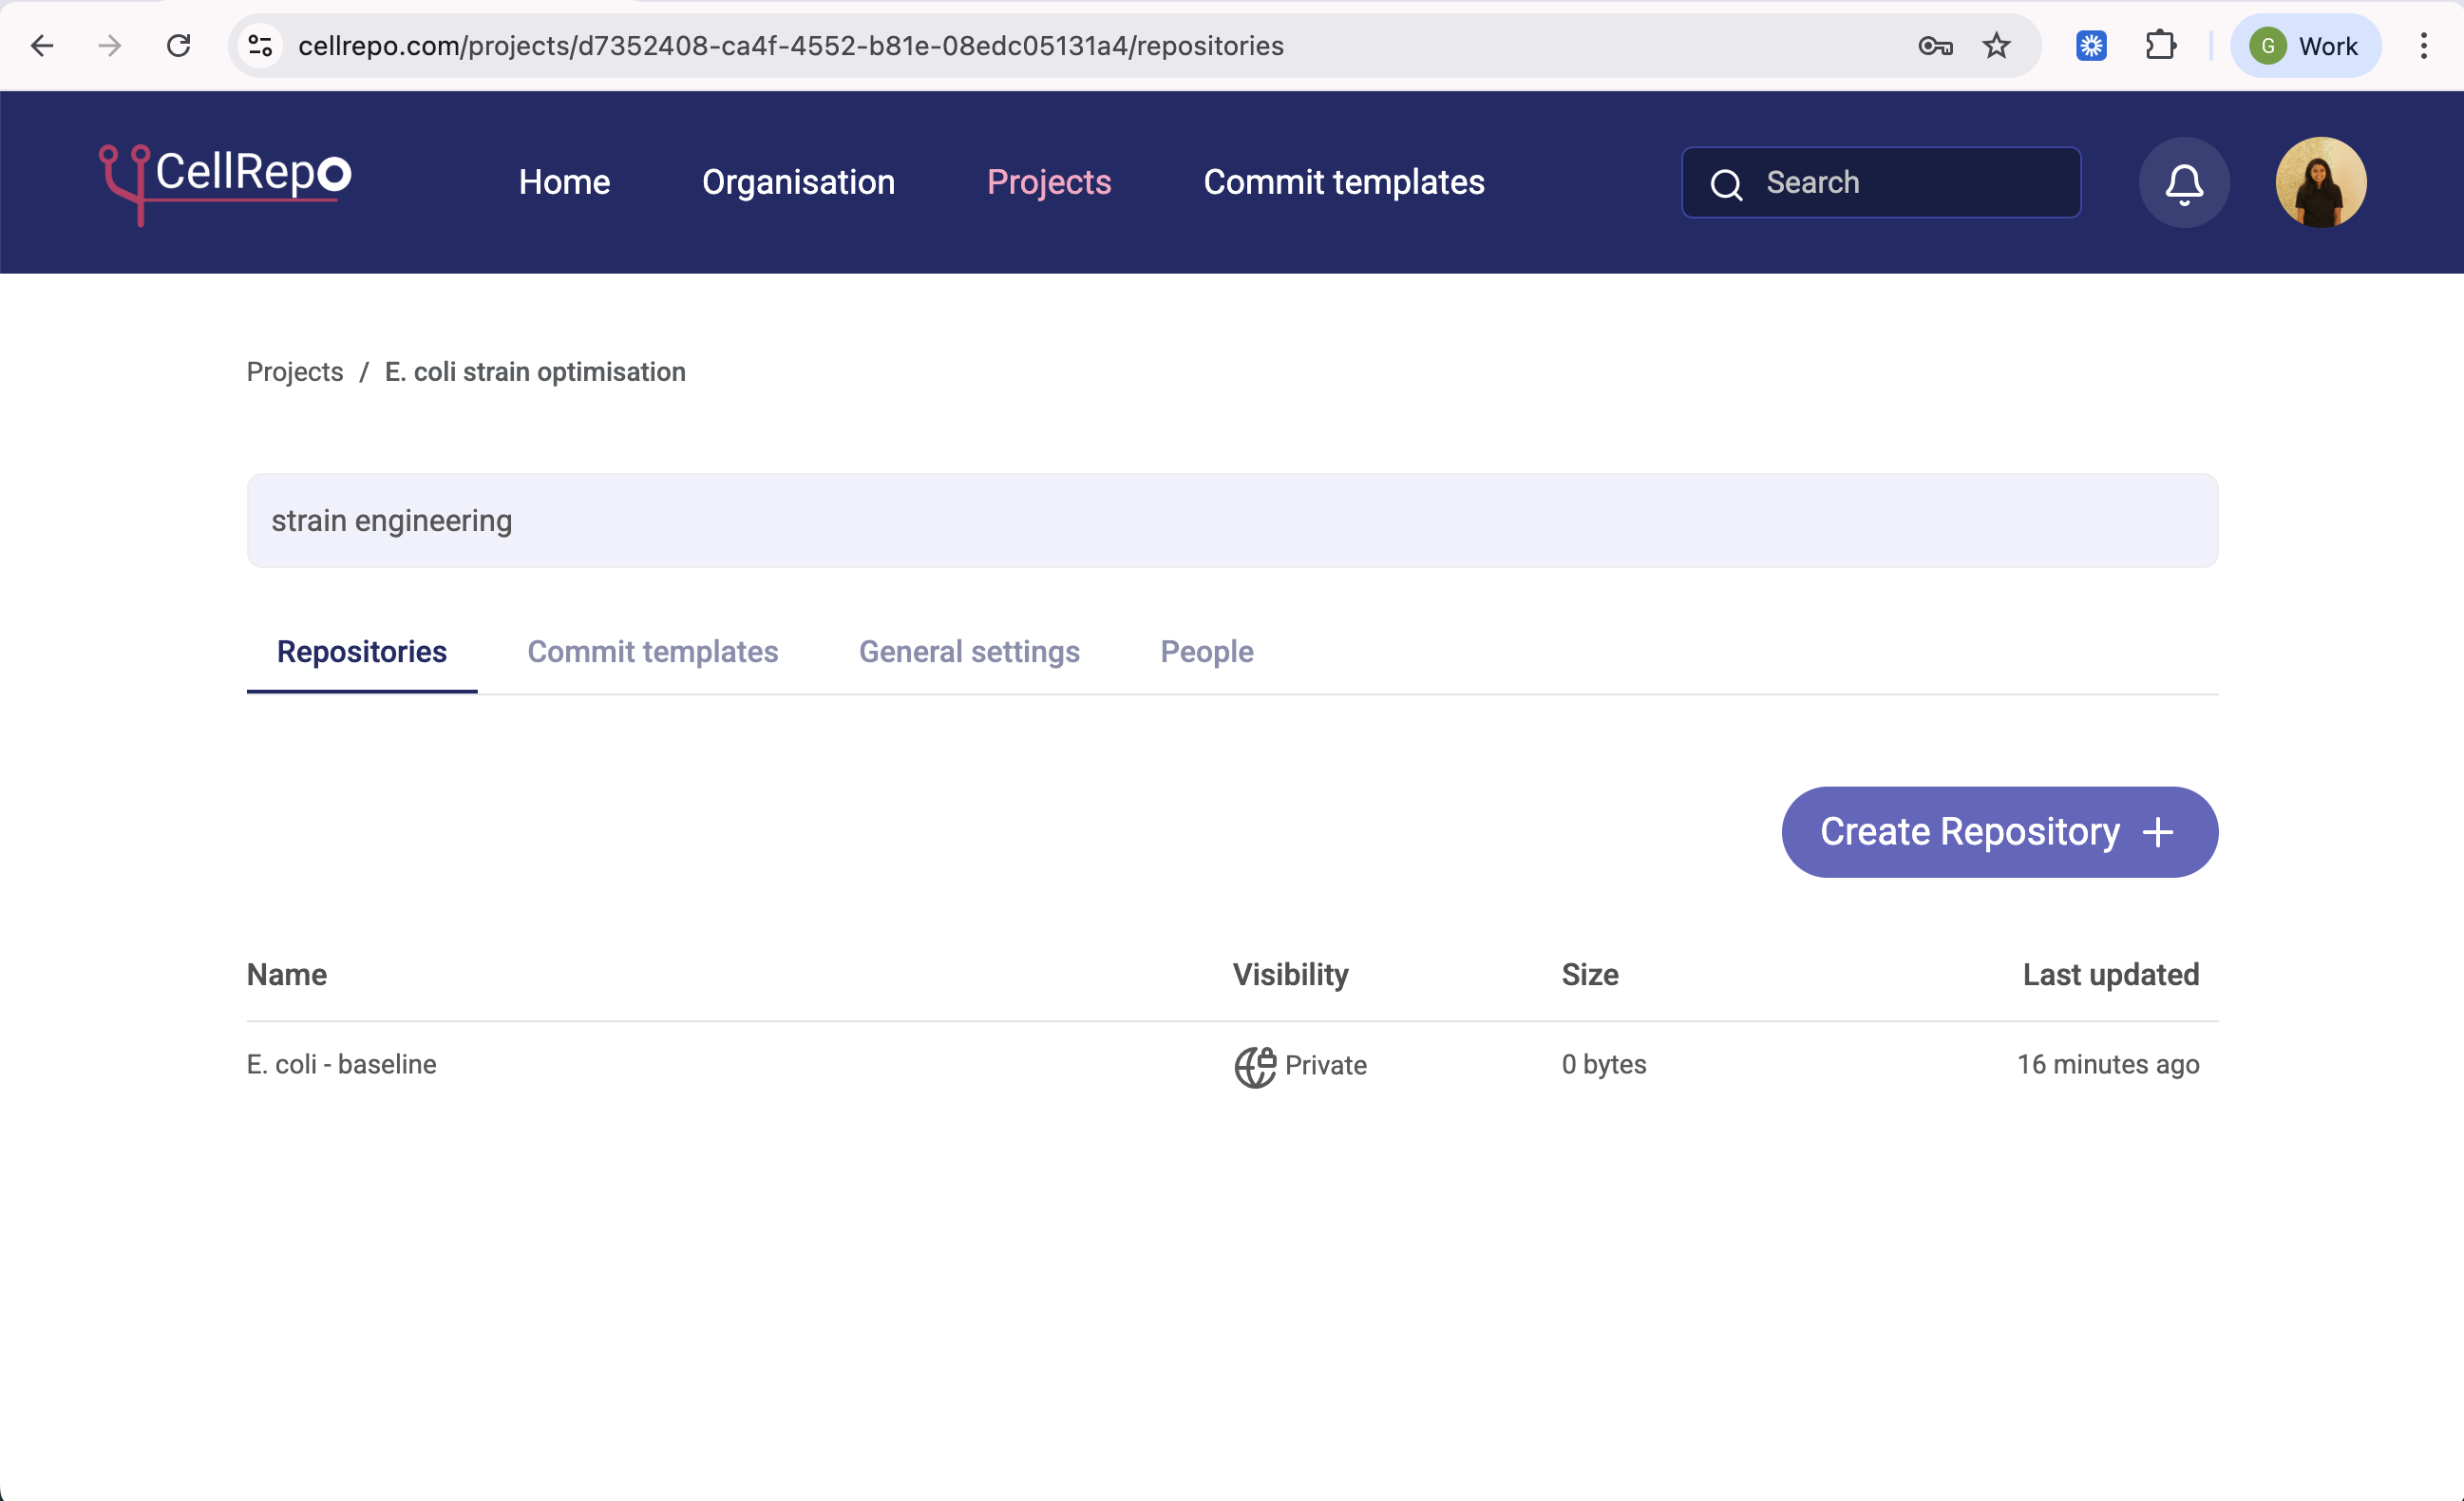
- Open the project where this asset belongs
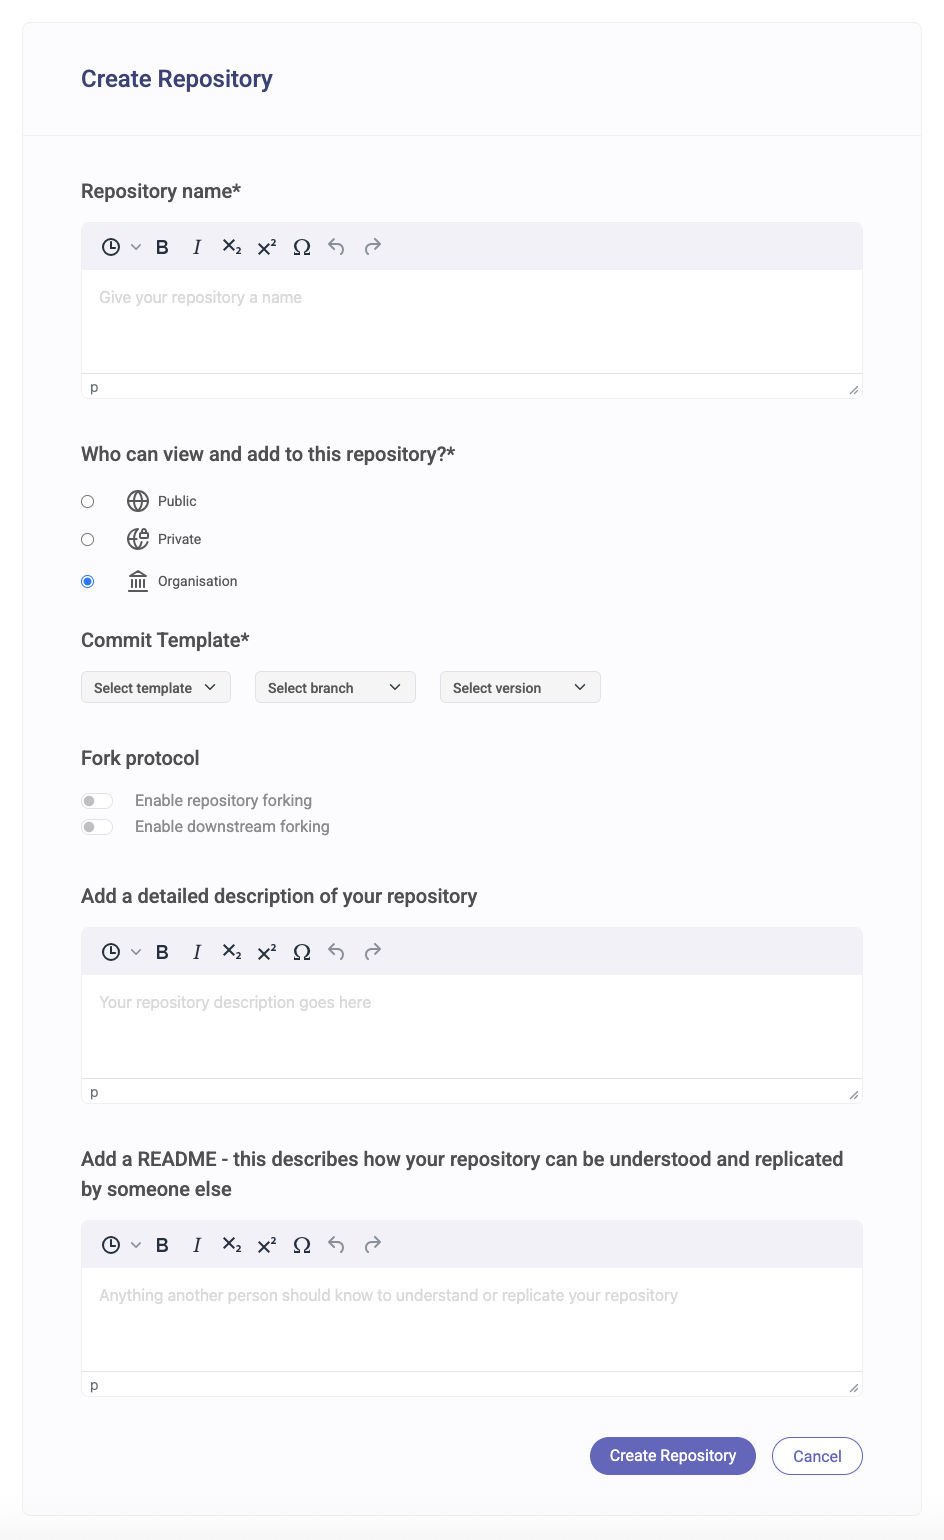
(see Create your first project if needed). - Click Create repository.
- Enter a clear repository name, we recommend standardising the naming of the repositories across the organisation as well as for personal clarity, eg. to contain date, species, research objective etc. You will also see commit template options, for now we can start with the Public/Default Template.
- Select a commit template.
- Choose visibility (private is common when starting).
- Add a short description if helpful.
- Click Create repository.
Selecting a commit template is required because it defines how future commits will be structured.
Example names:
- “Baseline strain”
- “CRISPR knockout ΔlacZ”
- “Plasmid pABC-GFP v1”
Avoid names like:
- “Strain 1”
- “Final”
- “Test” , as they can be confusing when looking back at them among various other repositories.
Clear names make repositories easier to recognise later.
About commit templates (quick note)
When creating a repository, you may see commit templates listed in the form.
You do not need to choose or configure a template at this stage.
Commit templates are optional structures that help standardise how experimental changes are recorded.
They become relevant when you start making commits, not when creating the repository itself.
Commit templates essentially:
- define how future commits will be structured
- do not affect repository ownership or access
- can be changed or refined later
If you’re unsure which template to use: - start with a simple one i.e. public template - refine templates once you begin recording work
We explain commit templates in detail in the next section.
→ Understanding commit templates
Visibility, people, and labs
When creating a repository, you can control who has access.
Depending on your setup, you may be able to:
- keep the repository private,
- share it with specific people,
- or share it with a lab.
If a lab is selected, all members of that lab gain access to the repository.
Labs themselves do not define permissions —
they simply help group people.
Actual access is still controlled at the repository and project level.
Visibility and access can be changed later.
What happens after creation
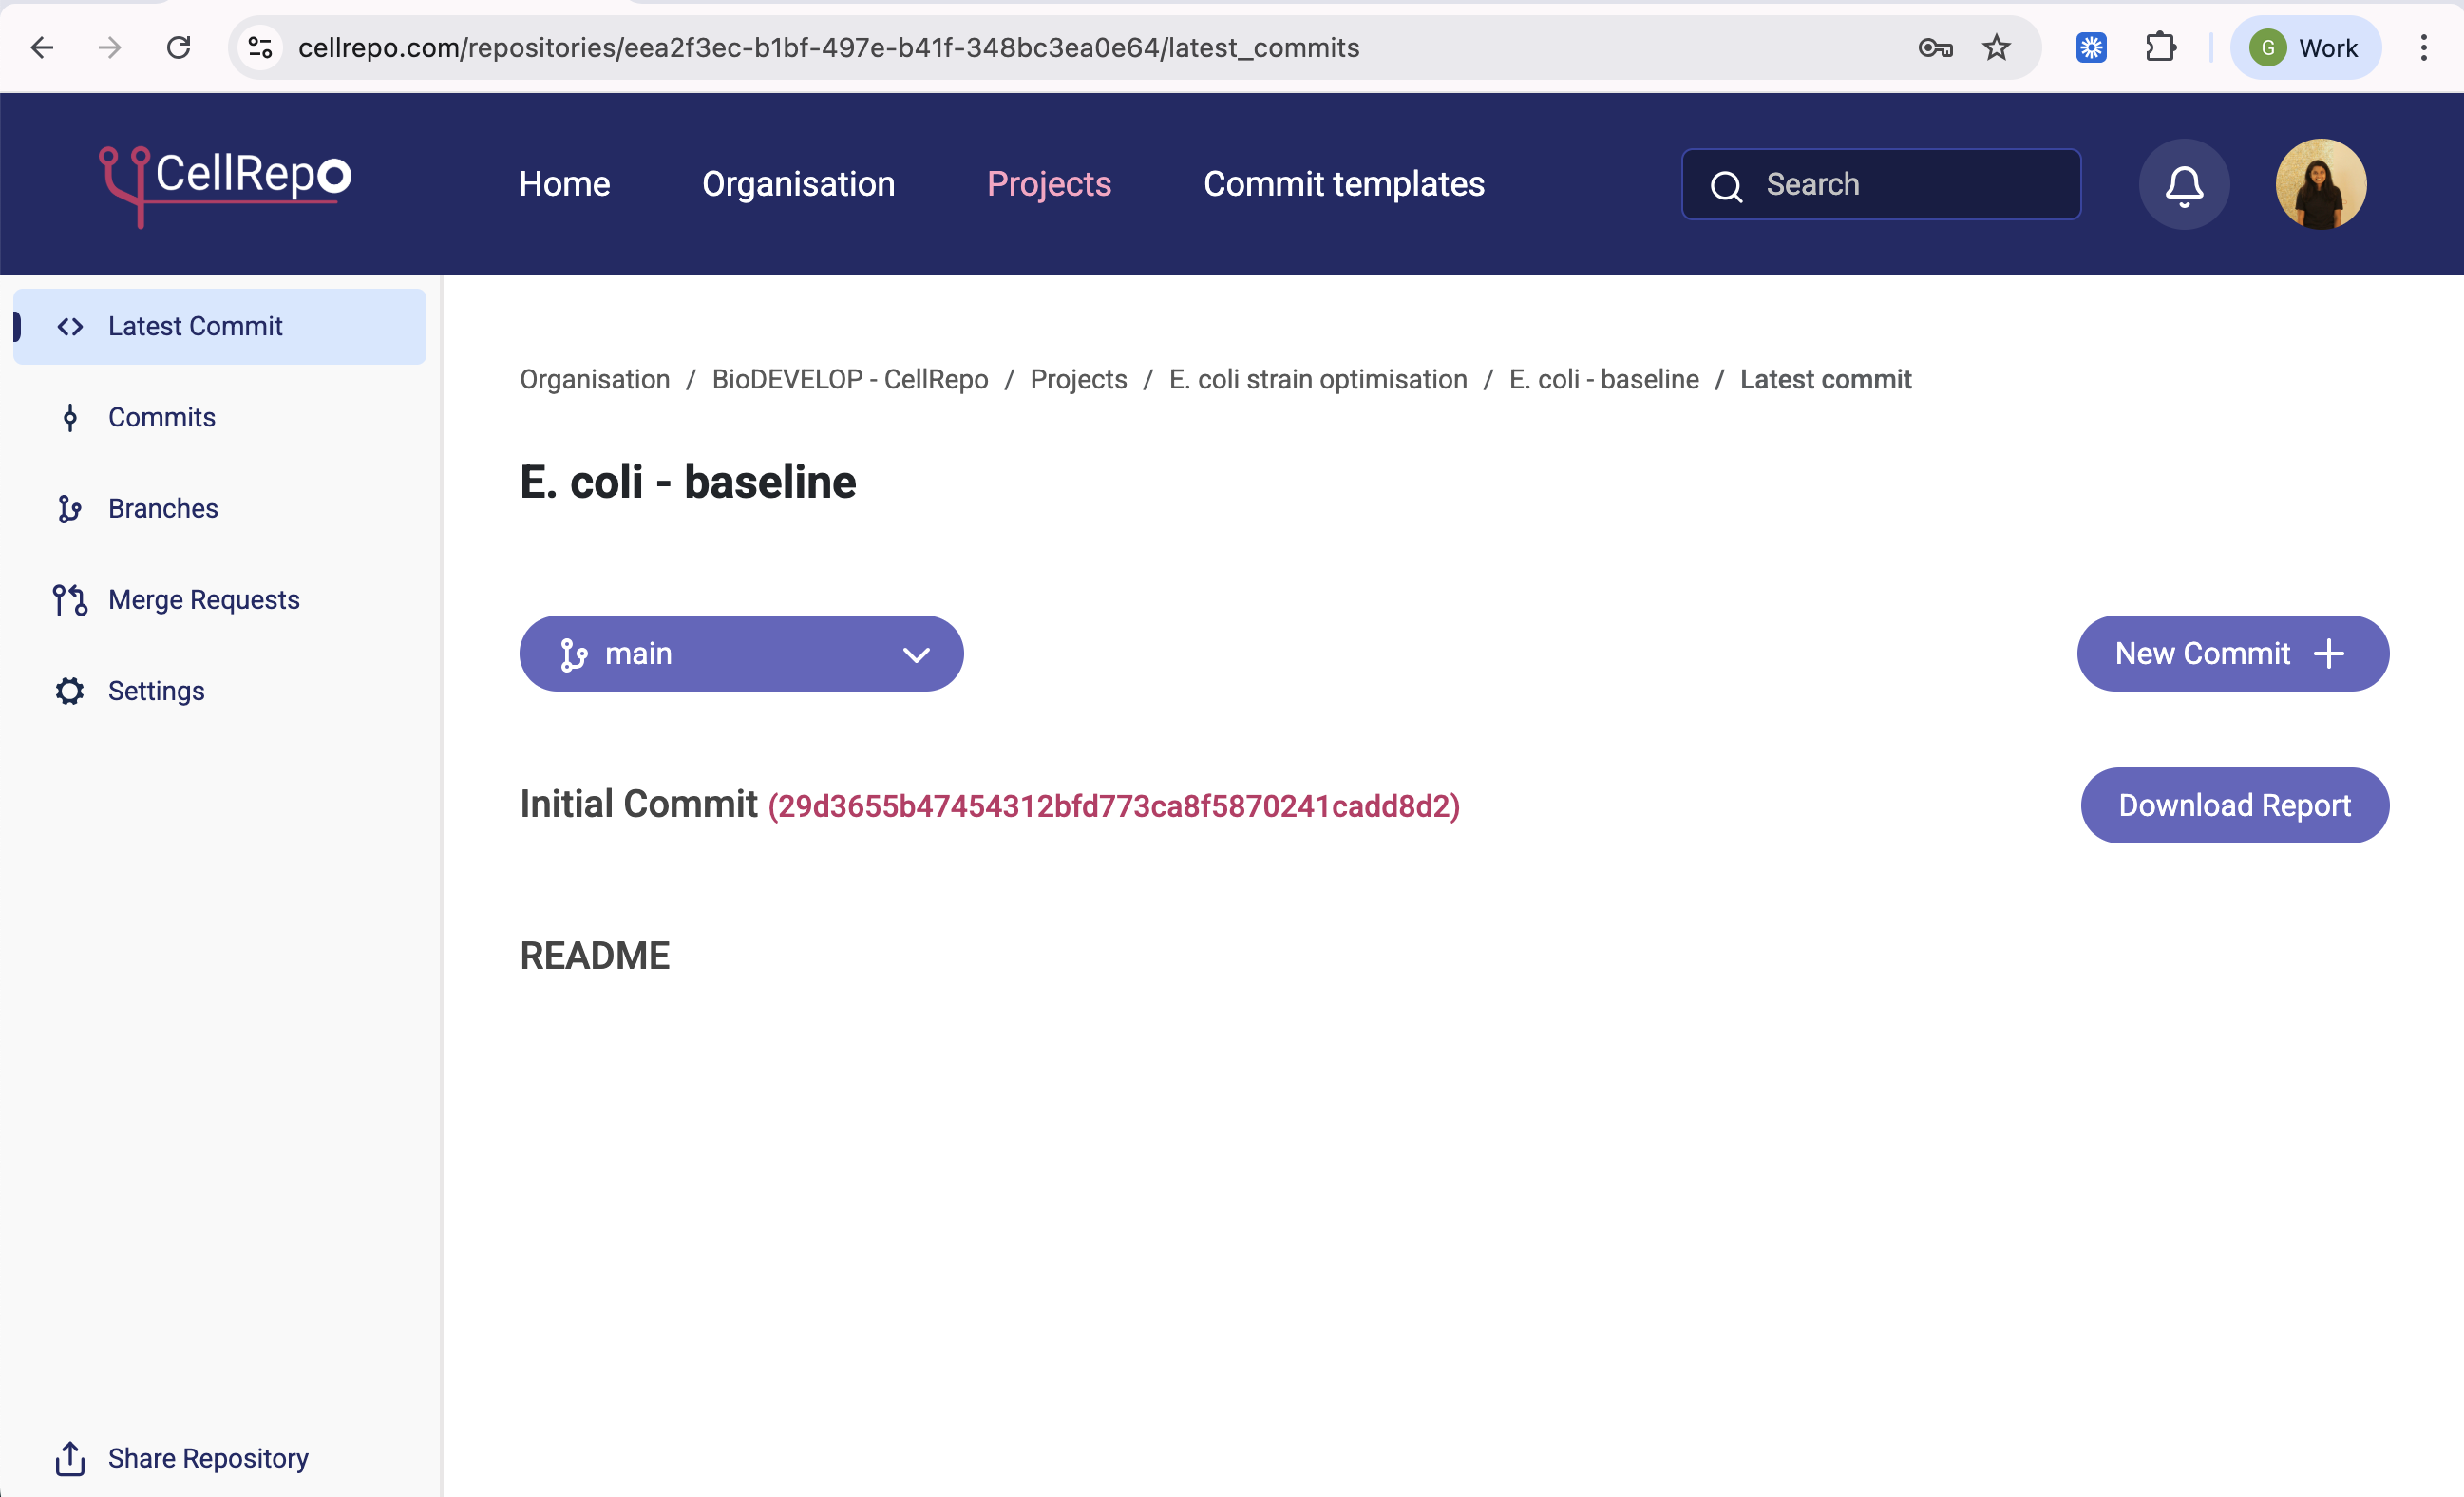
After the repository is created:
- it exists, but contains no recorded state yet,
- no experimental history is saved,
- nothing is tracked until you make a commit.
You’ll see sections such as:
- Latest commit
- Commits
- Branches
- Merge Requests
- Settings
This is where ongoing tracking happens. The next step is to make a commit, which captures the current state of the asset.
This is where CellRepo begins to provide traceability.
Branches (optional)
Branches allow you to explore different directions of the same asset.
For example:
- different growth conditions,
- parallel experimental setups,
- alternative optimisation paths.
You do not need to use branches immediately.
Many users start with a single main branch and introduce branches later if needed.
If you’re unsure how to structure things
It’s normal to wonder whether you’re structuring repositories “correctly”.
You can always:
- create additional repositories later,
- rename repositories,
- adjust visibility and access,
- reorganise as your work evolves.
CellRepo is designed to support change, not lock you into early decisions.
Getting help
If you’re unsure how to structure a repository, how visibility should work, or how to use commits and templates, you don’t need to guess.
We’re happy to help you think through real lab scenarios.
What to read next
Once a repository exists, the next step is to record its current state.